Italcertifer Laboratories perform experimental analysis of deformations, stresses and loads applied, instrumenting both the rolling stock and the infrastructure, and using certified personnel for the part of controls with electrical resistance strain gauges.
Some of the main areas of application are the following:
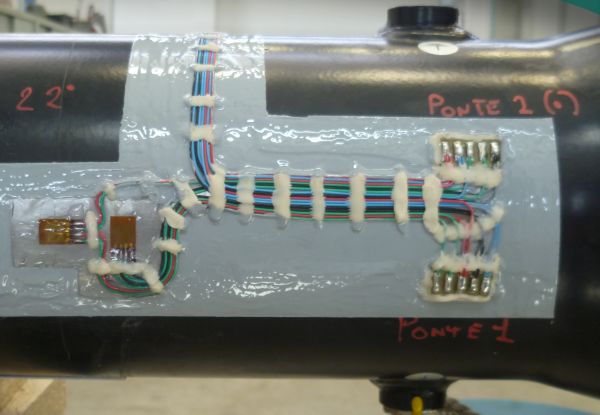
The strain gauge technique allows to experimentally determine the deformations of a component by means of sensors called strain gauges; these, suitably glued to the surface of the analyzed component, return a signal proportional to the deformation of the component itself.
This method is commonly used for both static and dynamic analysis, and is also applicable in hostile environments.
Strain gauge tests are commonly performed to verify the actual state of deformation or stress of a component during normal operation (for example for structural or fatigue tests), on specimens for tests with controlled stresses, to validate finite element models or to measure the loads transmitted by components in operation.
Italcertifer Laboratories have got the skills and instrumentation necessary to transform components such as connecting rods, traction bars, tensioners, buffers, hydraulic or pneumatic actuators into load cells through strain gauge instrumentation and related calibration of the component.
The activities are carried out by ISO 9712 certified personnel for checks with electrical resistance strain gauges and are able to provide a complete service in the field of strain gauges (test design, component instrumentation, data acquisition and analysis, interpretation of results).
In the railway sector, applications concern both rolling stock and infrastructure.
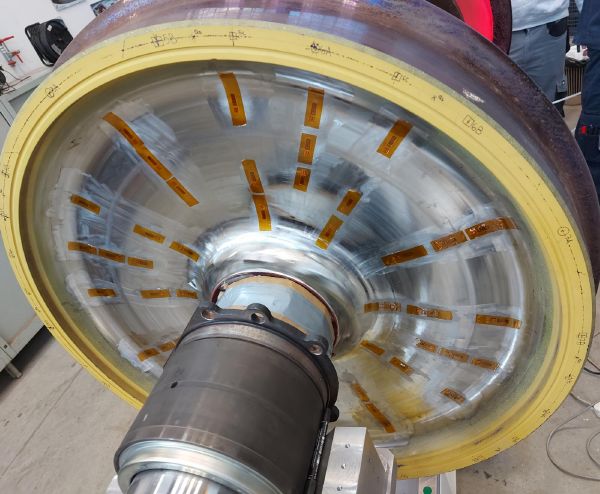
Italcertifer Laboratories assemble railway wheelsets for the measurement of wheel-rail contact forces for the purposes of vehicle certification in accordance with EN 14363 and UIC518 Standards, for investigative tests or for diagnostic purposes relating to both vehicles and infrastructure.
Wheelset assembling allows the contact forces to be accurately determined in real time by measuring strains with strain gauges; these are suitably arranged on the wheels or on the axle in such a way as to distinguish the various force components exchanged between wheel and rail (vertical, longitudinal and axial).
The optimization of the arrangement is carried out thanks to the know-how deriving from years of applications, with the aid of both numerical and experimental techniques, studied from time to time to adapt to any type of wheelset (different types of wheel and axle, braking or traction wheelsets, etc.). The assembly can be performed both on standard wheels and on specially made wheels, with solutions that can also be adapted to long-term applications and to high-speed vehicles. The laboratory has previous experience up to 400 km/h (248.5 mph).
Italcertifer Laboratories have a test bench for the mechanical characterization and calibration of the assembled wheelsets. The bench may replicate the combinations of forces present during the operating conditions, guaranteeing the maximum accuracy of the measurements.
Wheelsets can also be assembled for the measurement of deformations or temperature: in this case the laboratory has experience in braking temperature measurements up to 360 km/h (223.7 mph).
Given the many years of experience in testing in the railway sector, in addition to assembly, Italcertifer Laboratories can also offer the services of data acquisition, analysis and interpretation.
Laboratories in Italcertifer SpA have qualified personnel and the necessary instrumentation to carry out tests of the quality of current collection in accordance with the European reference standards with measurement of the forces between the slider and the catenary, of the aerodynamic lift, the lifting of the catenary (both on the ground both on the train), and electric arcs.
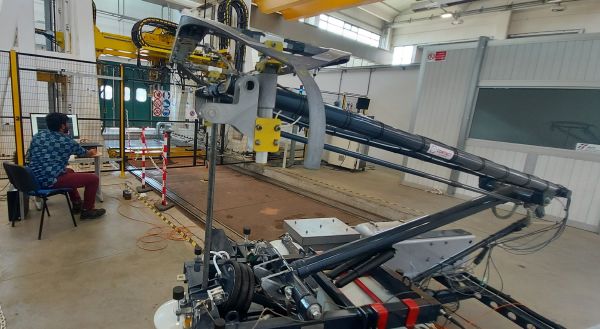
The pantograph assembly has a particular technical importance for measuring the force exchanged between the contact strip and the catenary. For this scope, the pantograph is assembled with accelerometers, load cells, displacement transducers, and/or strain gauges.
Subsequently, the assembled pantograph is calibrated by the Italcertifer Laboratories through collaboration with Rete Ferroviaria Italiana (RFI) for the use of the Pantograph Test Bench located at the Test Center in Florence.
All the measuring equipment used comply with the provisions of the international reference standard, subject to periodic calibration and are kept under control by the Italcertifer Laboratory through an adequate metrological confirmation process.